Prevent Common Causes of Bursting Pipes

Preventing bursting pipes is extremely important because it can cause significant damage to homes and businesses. Bursting pipes can lead to flooding, extensive water damage, and the need for costly repairs. They can also create safety hazards such as electrical shocks or the potential for mold growth.

In addition, burst pipes may interrupt water service, affecting access to running water for drinking, cleaning, and other everyday activities. Therefore, preventative measures like regular maintenance and inspections of plumbing systems are essential to avoid these potentially catastrophic events.

The Costly Consequences of Water Damage

If a pipe bursts, it can cause severe flooding, which can lead to:

  • Structural damage to walls and ceilings
  • Mold growth
  • Damage to furniture and other items
  • Rotting wood supports and flooring
  • Electrical problems due to water exposure

These issues may have long-term impacts on the health of those living in or working in the building. In addition to these physical damages caused by water intrusion, property owners are often responsible for paying expensive repair bills that add up quickly if not addressed immediately.

Common Causes of Bursting Pipes

A variety of factors can cause bursting pipes. Common causes include:

  • Freezing temperatures
  • Corrosion and rust buildup
  • Tree roots grow into the pipes
  • High water pressure

In addition, older homes may have outdated plumbing systems that are more prone to bursting or leaking over time.

Preventative Measures for Freezing Temperatures

Freezing temperatures are a very rare occurrence in Palm Springs and the Coachella Valley. However, there have been freezing temperatures a few times in the past. So, preparing for freezing weather can help prevent your pipes from freezing and bursting.

When temperatures drop and water freezes, it expands and places tremendous pressure on pipes and joints, leading to cracks or bursts. To prevent freezing, homeowners should insulate exposed pipes and keep their thermostats above 55 degrees Fahrenheit during cold months.

Keeping cabinet doors open in areas with plumbing systems can also help provide some warmth and reduce the chances of frozen pipes. Should your pipes ever freeze, in extreme cases a professional plumber should be called to apply heat and thaw frozen pipes before they burst.

Tackling Corrosion and Rust Buildup

To help reduce this issue, homeowners should have their water tested for PH levels and other contaminants. If the water is acidic, an appropriate filter system should be installed to neutralize the PH levels before they reach the pipes. In addition, regular inspections of plumbing systems can help identify any areas where corrosion or rust has already begun to form so that it can be addressed before it leads to serious pipe damage.

Controlling Water Pressure

Excessively high pressure can cause pipes and joints to become overstressed, causing cracking or bursting. To address this issue, ensure your home has a water pressure regulator designed to keep water pressure at safe levels.

In addition, homeowners should check the pressure setting on the pressure regulator to ensure it is not turned up too high. If it is, they should turn it down or call their plumber for assistance. Inspecting the plumbing system for any signs of excessive pressure wear and tear is also beneficial so that repairs can be made as soon as possible if needed.

Addressing Tree Root Invasion

Prevent bursting pipes

Tree roots can also cause serious damage to plumbing systems. Tree roots can grow through the tiniest of openings where pipes connect if they are not properly sealed. If a tree root invades a pipe, it may grow large enough to block the water flow and lead to bursting pipes.

To prevent this, homeowners should avoid planting trees near their home’s plumbing system or install special PVC piping with metal grates designed to keep out invading tree roots. Additionally, routine plumbing system inspections can help identify areas where tree roots have already infiltrated so they can be removed before further damage is done.

What Should I Do if I Have a Burst Pipe?

If your home or business has a burst pipe, it is important to take immediate action. Turn off the main water supply valve and immediately call KC’s 23 ½ Hour Plumbing and Air Conditioning.

Our plumbers will assess the situation, inspect the home for water damage, and make the necessary repairs. We can also help prevent the common causes of burst pipes with our maintenance services. Contact us today to schedule an appointment.

Can Older Homes Support a Low-Flow Toilet?

new toilet installation

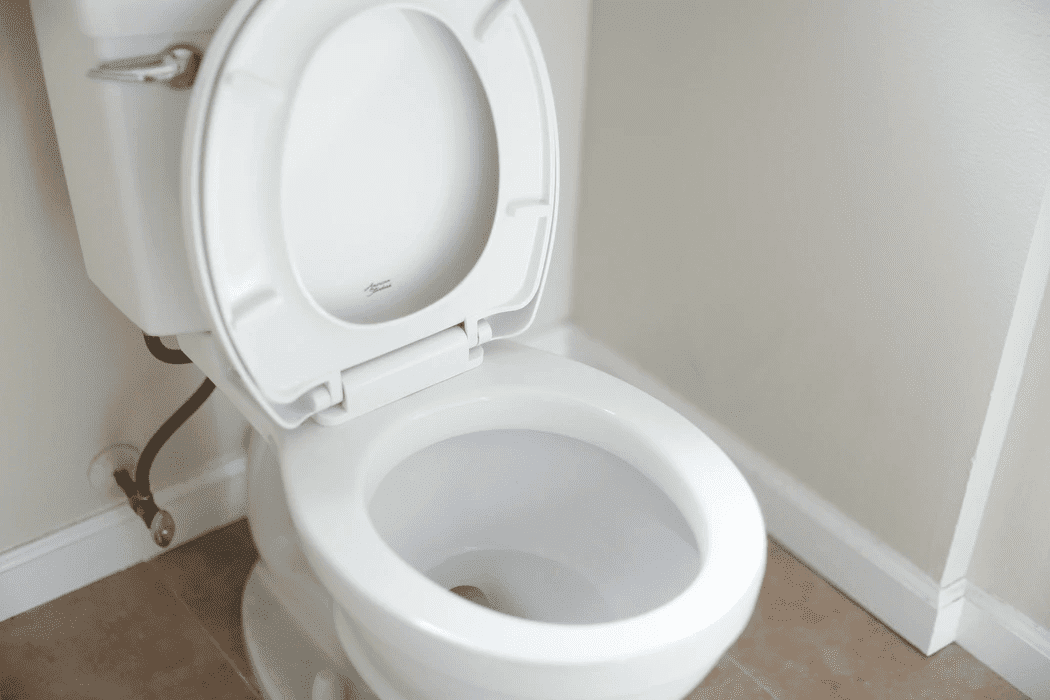
Not all homes can take advantage of high-efficiency plumbing solutions like low-flow toilets, which are designed to reduce water consumption. Older homes were designed with the assumption that a toilet flush would need three gallons of water to carry away waste. Low-flow toilets use about half that water (1.6 gallons) to accomplish the same task, thereby helping you save water.

In short, installing a low-flow toilet will help you save thousands of gallons of water every year. Of course, that also results in huge savings, money-wise, as your water bill will go down drastically.

However, replacing your flush toilet with a low-flush one isn’t always straightforward, especially in older homes. So let’s dive into the considerations you need to make to upgrade to a low-flow toilet in an older home.

Challenges of Older Homes and Low-Flow Toilets

Installing a low-flow toilet into your older home isn’t a matter of plug-and-play. There are a few factors to consider for your successful toilet upgrade. Here are the most common ones:

Pipe Slopes

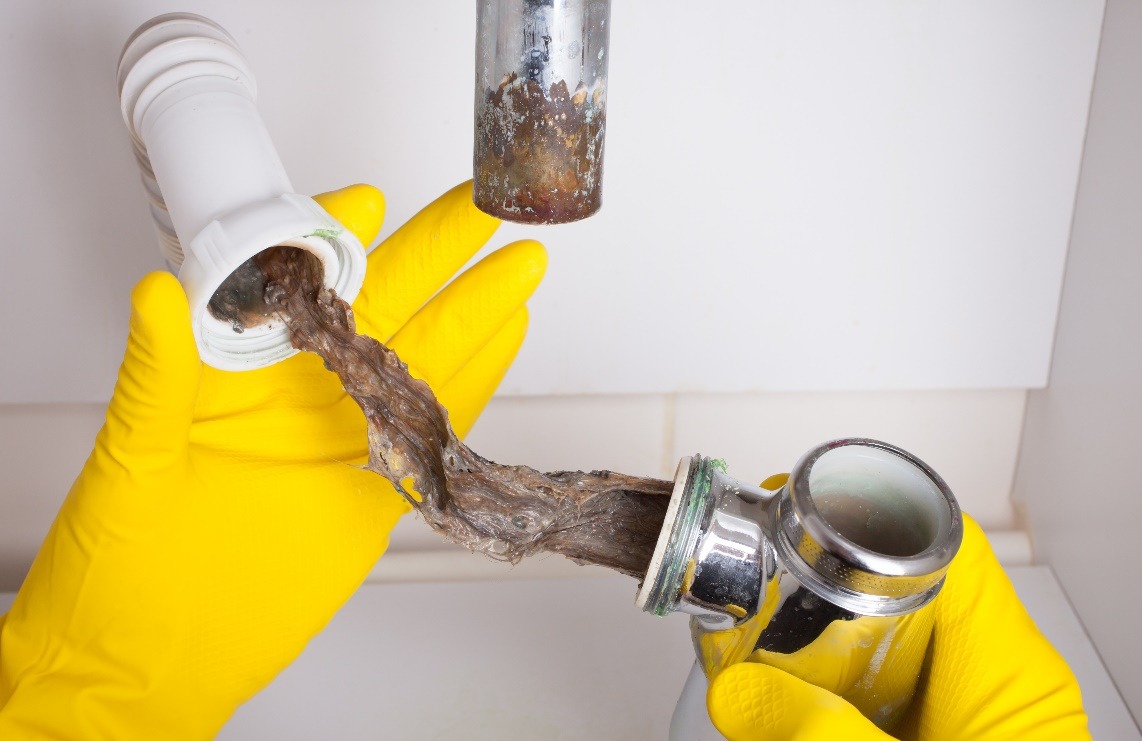
One of the challenges in older homes is the waste drain beneath the toilet. It needs to have a 1/8-in to 1/4-slope per foot of water required to carry solid waste to the sewer system. If the slope is level or too steep, the water flow will be negatively affected. This may end up resulting in water build-up or clog the lines.

Most Systems Are Capable

While most homes have plumbing that will support low-flow toilets, there are a couple of warning signs that can indicate your system may have problems:

  • Your current toilet backs up occasionally, even when solid waste wasn’t flushed. This problem could be the result of a clogged waste line.
  • You can see standing water in the waste line when the toilet is lifted off the floor so you can check the drain.

The savings you make from installing a low-flow toilet are worth the minor challenges you may have to overcome to get your new toilet working. So take the plunge and upgrade your toilet.

Considerations to Make When Installing a Low-Flow Toilet

Sold on the idea of water conservation by installing a low-flow toilet? Here are a few considerations to make as you install your new toilet:

Low-Flow Toilets and Old Pipes – It Might Not Work

Before installing a low-flow toilet in an older home, you must also consider upgrading your plumbing system. These will help your toilet more efficiently get rid of waste with minimal water pressure and flow.

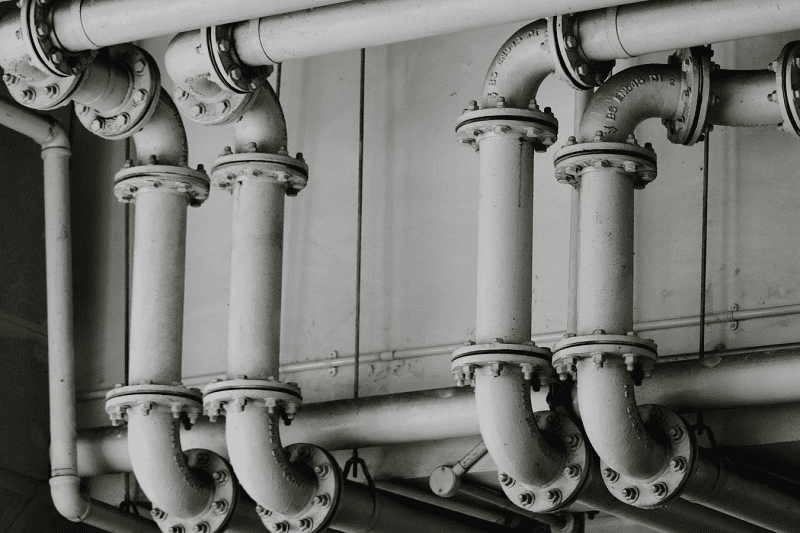
One of the upgrades you should consider is using PVC piping to handle the low flow better and reduce the chances of waste clinging to the piping. That’s because the low-flow toilet/old pipes combination might not give you the best results.

However, if you’d prefer to keep the older cast-iron pipes, you can’t rely on gravity to help flush away solid waste. To do so, you may have to install a pressure-assisted low-flow toilet. This “boosts” the flush using pressurized air in the toilet tank. The only caveat to pressure-assisted toilets is they can be expensive. They can also be quite noisy.

Maintenance and Care

brown and white concrete house near bare trees To get the best out of your low-flow toilet, you must ensure you use it for its intended purpose. Don’t use it to get rid of paper towels or other trash, as this may lead to a clogged toilet. You must also avoid using chemical cleaners, as they can cause some of the hardware to deteriorate.

When it comes to maintenance, ensure you only use parts recommended by the manufacturer.

Ready to Upgrade to a Low-Flow Toilet?

If you’re ready to install a new toilet, go ahead and get in touch with us at 760-327-8718. We’ll be more than happy to assist—any time of day.

Plumber’s Guide to Sewer Line Repair and Replacement

grey metal pipes Nothing is as frustrating as taking a shower only to find that the water isn’t draining. Well, nothing except for flushing your toilet and seeing the water flowing out from the bottom of the toilet.

Both are signs that your sewer line is damaged and needs urgent repair. Otherwise, there’ll be plenty of messy cleanups required—and that’s not to mention the unpleasant smell that will be wafting through your house.

So, what’s involved in a sewer line repair? Let’s dive in.

Causes of Sewer Line Damage

Before we look at what to expect when faced with a sewer line repair, let’s briefly look at the common causes of sewer line damage.

Corroded Pipes

One of the most common causes of sewer line damage, particularly in older houses, is the corrosion that most steel and cast iron pipes are susceptible to. While they may be galvanized to prevent rust, the build-up of minerals like calcium and magnesium causes chemical reactions that lead to the pipes losing their integrity.

Tree Roots

Tree roots are another culprit when it comes to damaging sewer lines. In their search for water, they get attracted to your pipes. Once they reach your sewer line, they wrap around the pipes and squeeze them, leading to them rupturing.

Clogs in the Pipes

You must take clogs in your sewer line seriously, as they can lead to extensive damage. The build-up of pressure in the pipes could lead to them cracking or bursting.

Extreme Temperature Changes

If you live in a place with extremes in temperature, you’re likely to experience damaged pipes due to water freezing in the pipes. In some rare cases, extreme heat can lead to burst pipes too. However, the most significant contributor to damaged sewer lines are sudden and extreme temperature changes as far as temperature is concerned. These slowly weaken the pipes, setting them up for a pipe burst.

Warning Signs That You Need a Sewer Line Repair

Now that you’ve seen the causes of sewer line damage, are there some warning signs that can show that you need a sewer line repair? There certainly are. Here are some you must look out for:

Poor Draining

One of the first signs that show that you need a sewer line repair is poor draining. While a single drain is not an indicator of damage to your sewer line, when you find many drains in your home performing poorly, be sure you need to repair your sewer line.

Flooding in Yard

Pools of water in your yard are an indicator of a damaged sewer line. In most cases, the water will be clean, but the foul smell that precedes it indicates that it’s the sewer line and not the water supply line that needs repair.

Water Damage in the Home

Water damage, such as mold on the floor or walls, delamination of materials, rotting of wood, etc., is another tell-tale sign that you need a sewer line repair.

Strange Sounds and Foul Odors

Gurgling or bubbling sounds in your drainage pipes is a sure sign that you have a problem with your sewer lines. In the same vein, foul odors in the yard or home are another indicator that your sewer line could be damaged.

Do You Need a Sewer Drain Inspection?

How do you ensure that your sewer line is damaged and needs to be repaired? Before you go out and dig up your yard, you must conduct a sewer drain inspection. One of the easiest ways to do this is performing a sewer line camera inspection. This is when a video camera is attached to the end of the line. The sewer line camera is then run through the drain and transmits what it captures to a TV screen above ground.

Sewer line camera inspections will help you save time and money as they can easily reveal:

  • The condition of your pipes without having to dig them out
  • Where the damage lies and how extensive it is

Our DrainVision camera system has proven invaluable in efficiently inspecting drains and effectively carrying out sewer line repairs for our clients.

The Importance of Sewer Cleaning and Maintenance

washbasins siphon cleaning in a bathroom

Don’t just wait for your sewer line to be damaged before attending to it. Mitigate damages and reduce the cost of repairs by conducting regular sewer cleaning and maintenance. Why is this important?

  • It increases your drain’s lifespan. Drain cleaning prevents the build-up of minerals and salts that can cause damage to your pipes, thereby increasing your drain’s lifespan.
  • It reduces clogs. Drain maintenance is crucial to preventing clogs in your pipes. These can be caused by fat, hair, and other materials sticking to the pipe walls and accumulating over time.
  • It prevents expensive repairs. Regular drain cleaning and maintenance will help you notice small issues before they become major repairs.
  • It leads to a clean, healthy home. A clean drain is essential to ensuring that you have a clean house that smells as fresh as it looks.

So, make sure to have a schedule for your drain cleaning and maintenance. Our AquaBright Jetting system does an excellent job of this, ensuring you have an efficient drain system.

Sewer Line Repair

Sewer line repair is not something you should attempt on your own if you’re a novice. It’s best left to the professionals.

If you suspect there could be some damage to your sewer line, give us a call at 760-327-8718. We’ll be glad to come and help—any time of day.

Garbage Disposal Not Working? 3 Common Problems & Fixes

kitchen sink with dirty dishes

When you find your garbage disposal is not working, it can be quite frustrating, but often the problem can be easily fixed. Here are some common garbage disposal problems and what you could do about them:

The Disposal Won’t Run

You should hear the motor humming when you turn on the switch. If not, there could be an electrical problem. Check that the system is plugged in; if you store items under the sink, it’s easy for the plug to jar loose. When this isn’t the source of the problem:

  • Press the red reset button on the bottom of the garbage disposal or,
  • Check for a tripped circuit breaker and reset it if necessary or,
  • Inspect the system for a wiring issue, or have a professional help you.

The Motor Hums but Doesn’t Grind

If you hear the garbage disposal humming, but it won’t turn on, a jammed flywheel is typically the reason due to stuck food waste or a foreign object. The reset button or circuit breaker usually trips in this case. Continuing to run the unit can burn out the motor.

Remember, never stick your hand into the drain; here’s how you can fix the issue:

  • Turn off the power to the garbage disposal.
  • Insert an offset wrench, or Allen key, into the flywheel turning hole—a wood spoon handle may work too.
  • Turn it clockwise to free the stuck flywheel or impeller.
  • Check the disposal with a flashlight and remove visible objects with pliers.
  • Restore power, press the red button, and run cold water while flipping the switch on and off quickly—this should dislodge debris.

Slow Draining

A pipe clog may cause your garbage disposal to drain slowly. Fixing it requires disassembling the drain trap and discharge pipe to clean out any blockages. If you can’t find any this way, the branch drain line may be clogged; it can be cleaned with a sink auger. Call a plumber if you’re not comfortable/familiar with this kind of procedure.

Garbage Disposal Leak

Smiling Man Washing Dish Plate If the unit is leaking from the sink flange, its mounting may have loosened. Turn off the power, remove the disposal, and tighten the mounting bolts of the flange. If these are tight, loosen them and push the flange up, and then insert new plumber’s putty between it and the sink. Retighten the bolts, wipe away excess putty, and reinstall and repower the disposal; run the water and look for any additional leaks.

A leak may also occur with the hose connecting the dishwasher to the garbage disposal. You can fix this by tightening the hose clamp that’s connected to the dishwasher inlet. If the hose keeps leaking, replace it. The discharge drainpipe is another potential leak point. This can be fixed by tightening loose bolts or replacing worn gasket seals.

Contact Your Local Plumber

If you can’t find a reason for your garbage disposal not working, or you don’t know how to fix it, contact KC’s 23½ Hour Plumbing. Our Coachella Valley plumbers are always ready to help. Call 760-327-8718 to request garbage disposal or plumbing repair.

How to Unclog a Drain with a Snake

woman callingof or emergency plumber

Whether it’s a clog in your bathtub or a back-up in one of your drains, any blockage in your plumbing is no fun. Besides the odd smells and the inconvenience, it could also lead to your home becoming a health hazard. Unfortunately, clogged plumbing is an inevitable part of having a plumbing system in your home—you can’t escape it. That’s why you must learn how to snake a drain.

Regardless of the type, drain snakes—also called plumbers’ snakes—are made of a long flexible cable with special ends for snagging or cutting through the source of the clog. Snaking a drain, therefore, is a phrase that means removing a stubborn clog out of your plumbing so that your sink, tub, or shower will drain the way it’s supposed to.

Removing a clog can be a drag, but you can easily do it with the proper tools and techniques without having to call your plumber.

Pros and Cons of Snaking Drains

Snaking your drain, like most things in life, has its pros and cons. Here are the most common ones:

Pros of Snaking Drains

Snaking your drain has several advantages that you can enjoy. Some of them include that it’s:

  • Affordable. Whether you make your snake or choose to buy one, a snake is a very inexpensive piece of equipment.
  • Easy to use. You don’t need any special skills to use a snake.
  • Effective. One of the biggest pros of using a snake to clear your drain is that it’s very effective. It (almost) always gets the job done.
  • Green.

Cons of Snaking Drains

While using a drain snake to unclog your drains has its advantages, it also has its cons, some of which are it:

  • Can’t clear some types of clogs. Some clogs may need a tool that can grab them to dislodge them effectively. A snake can’t do that.
  • May leave some debris. Especially if the drain snake is smaller in diameter than the pipe you’re cleaning, it can leave some material clinging to the pipe walls. This could cause more buildup of the stuff that blocked your drain in the first place.
  • Can’t always clear clogs. While a drain snake is a great tool for clearing clogs, some blockages may be too dense or extensive for the drain pipe.

Types of Drains

The first step in learning how to snake a drain is to understand the different types of drains you have in your home. Some of the most common types of drains include:

  • Main drain
  • Tub drain
  • Shower drains
  • Bathroom sink drains
  • Washing machine drains
  • Kitchen drains

Before you start snaking your drain, follow the pipes to understand how they go and how you’ll need to maneuver your drain snake.

How to Snake a Drain

So how do you snake a drain?

Here are a few steps you can take to ensure that you succeed at unclogging your drain using a drain snake:

Gain Access to the Drain

To gain access to the drain line, you can start by removing the appropriate covering part. You can use a regular wrench, pipe wrench, or tongue-and-groove pliers, depending on the drain type. If applicable, remove the cleanout plug from the drain line.

To get access to your drain:

  • For a sink drain, remove the drain stopper or the P-trap.
  • For a tub drain, remove the overflow assembly.
  • For a washing machine drain, remove the washer drain hose from the drain standpipe.

Prepare the Snake and Begin Snaking

Woman washing hands in sink With rubber gloves on, loosen the set screw on the drain snake. Doing so allows you to pull out the cable freely. Insert the snake into the drain and slide the cable in until it meets resistance. This could be the clog itself or simply a bend in the pipe. Tighten the set screw to clamp down on and apply just enough pressure to keep it from turning.

If it’s a bend, crank the snake handle clockwise while applying moderate pressure on the cable to work it into the drain. Continue until you feel the cable move past the bend.

Continue Snaking

Once you’ve passed the bend in the pipe, loosen the set screw and feed the cable by hand until it meets resistance again. If you feel like the drain snake has reached the clog, hook onto the clog by turning the snake. You can then pull the snake back up by loosening the set screw and pulling the cable back into its housing. It’s advisable to run the snake through a rag to keep the cable and housing clean. Repeat the process to ensure you’ve cleared your drain of every bit of debris.

Flush the Drain

Reinstall whatever you had removed and flush the drain with a full flow of water. For a washing machine drain, you can run a small rinse and drain cycle. Watch the drain carefully to ensure that the operation was a success and that the water is draining.

When to Call a Professional Plumber

If you’ve tried snaking your drain and find that the blockage persists, it’s time to get professional help. KC’s 23 ½ Hour Plumbing is always on standby to help you with your drain cleaning—any time of day or night. We use Endure drain cleaner and hydro-jetting to ensure your drains are completely clean for those tough-to-clean drains. So, go ahead and get in touch and let’s talk drain cleaning.